
The previous post broke down the production pipeline of Seoul Is a Bit Rough Today — and the most common feedback in the comments was “I get the theory, but I’m still lost when it comes to execution.” This time around, I’m taking that 3-hour-12-minute comprehensive tutorial and distilling it into 14 images — each one mapping to a single hands-on step, with parameters and prompts transcribed frame by frame from the video. Follow along and you’ll go from zero to finished piece.
First, here’s the full workflow skeleton. Know the map before you hit the road:
Script (3+3+3 Rule) → Asset Design (Turnarounds + Product/Prop Shots) → Storyboard (Acts/Scenes/Beats) → Prompts (RTCF Framework + Camera Language) → Video Generation (Multi-Image Reference + Full-Image Reference Mode) → CapCut Secondary Edit
Step 1: Meet Your Two Weapons
JIMENG is ByteDance’s official creation platform, and Seedance 2.5 is its flagship video model. LibTV is a node-based workstation wrapped around multiple models, with its core selling point being “multi-image reference” — you hang character sheets, scene renders, and prop photos all into the canvas, and the model cross-references them by number during generation. This is the foundation for everything that follows in maintaining character consistency.
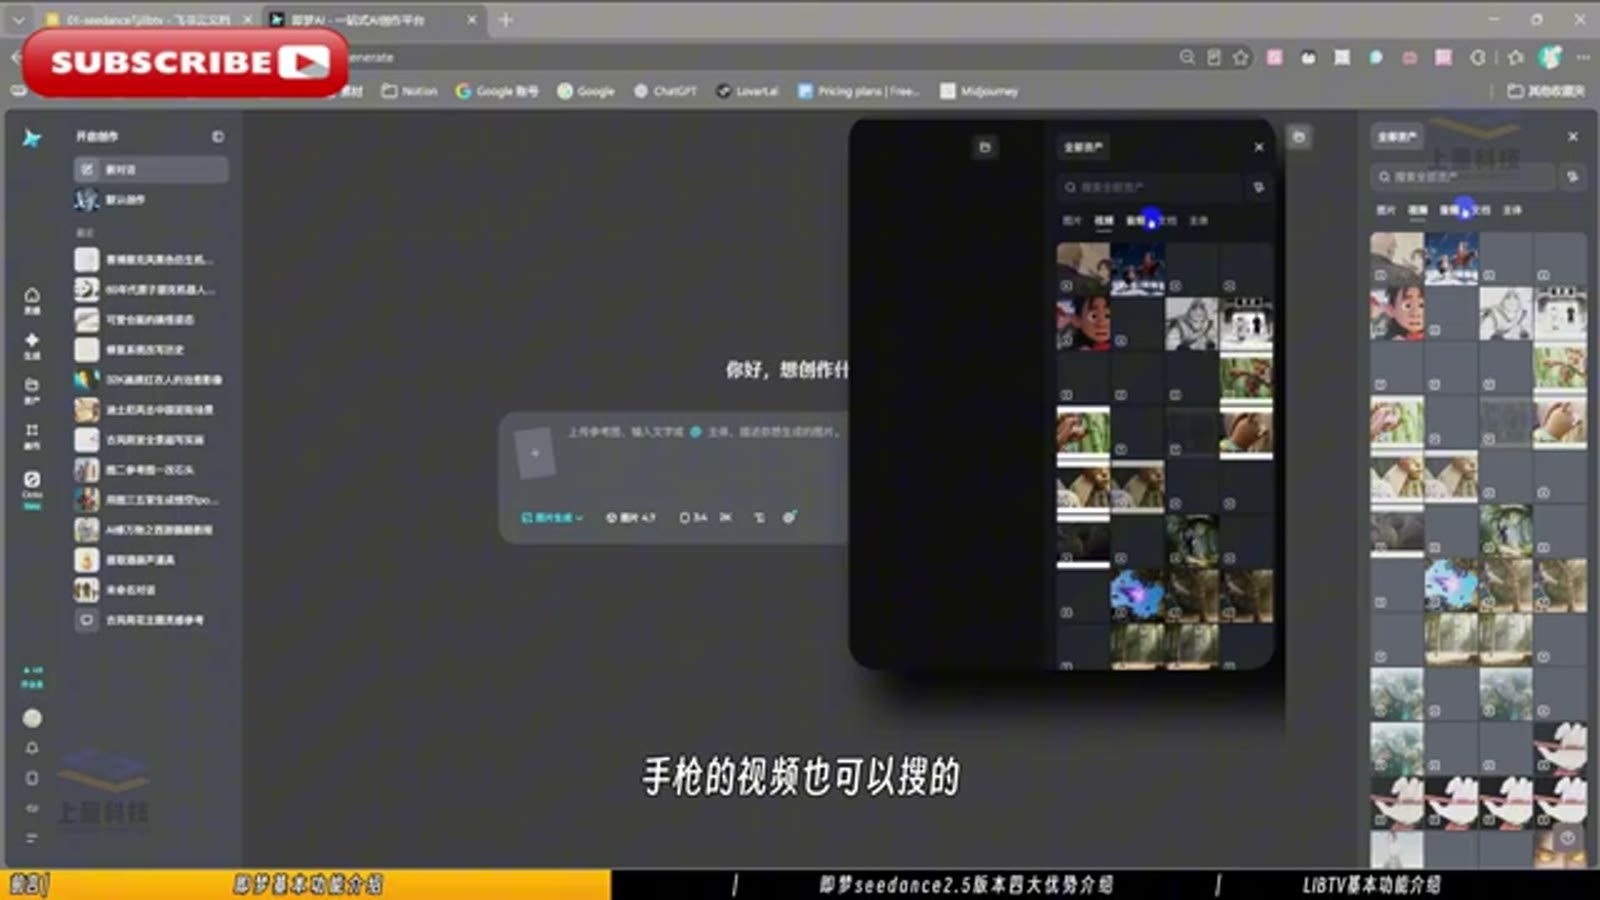
The first action demonstrated in the tutorial is refreshingly practical: searching for reference videos in the asset library. The instructor’s exact words were “you can even search for handgun reference videos” — finding references is the starting point of the entire pipeline. Watch how others shoot first, then decide how you’ll generate.
Step 2: Turn a Story into a Script with One Prompt
This is the single most worth-copying segment of the entire course. Rather than handwriting a script, the instructor sent DeepSeek a structured instruction:
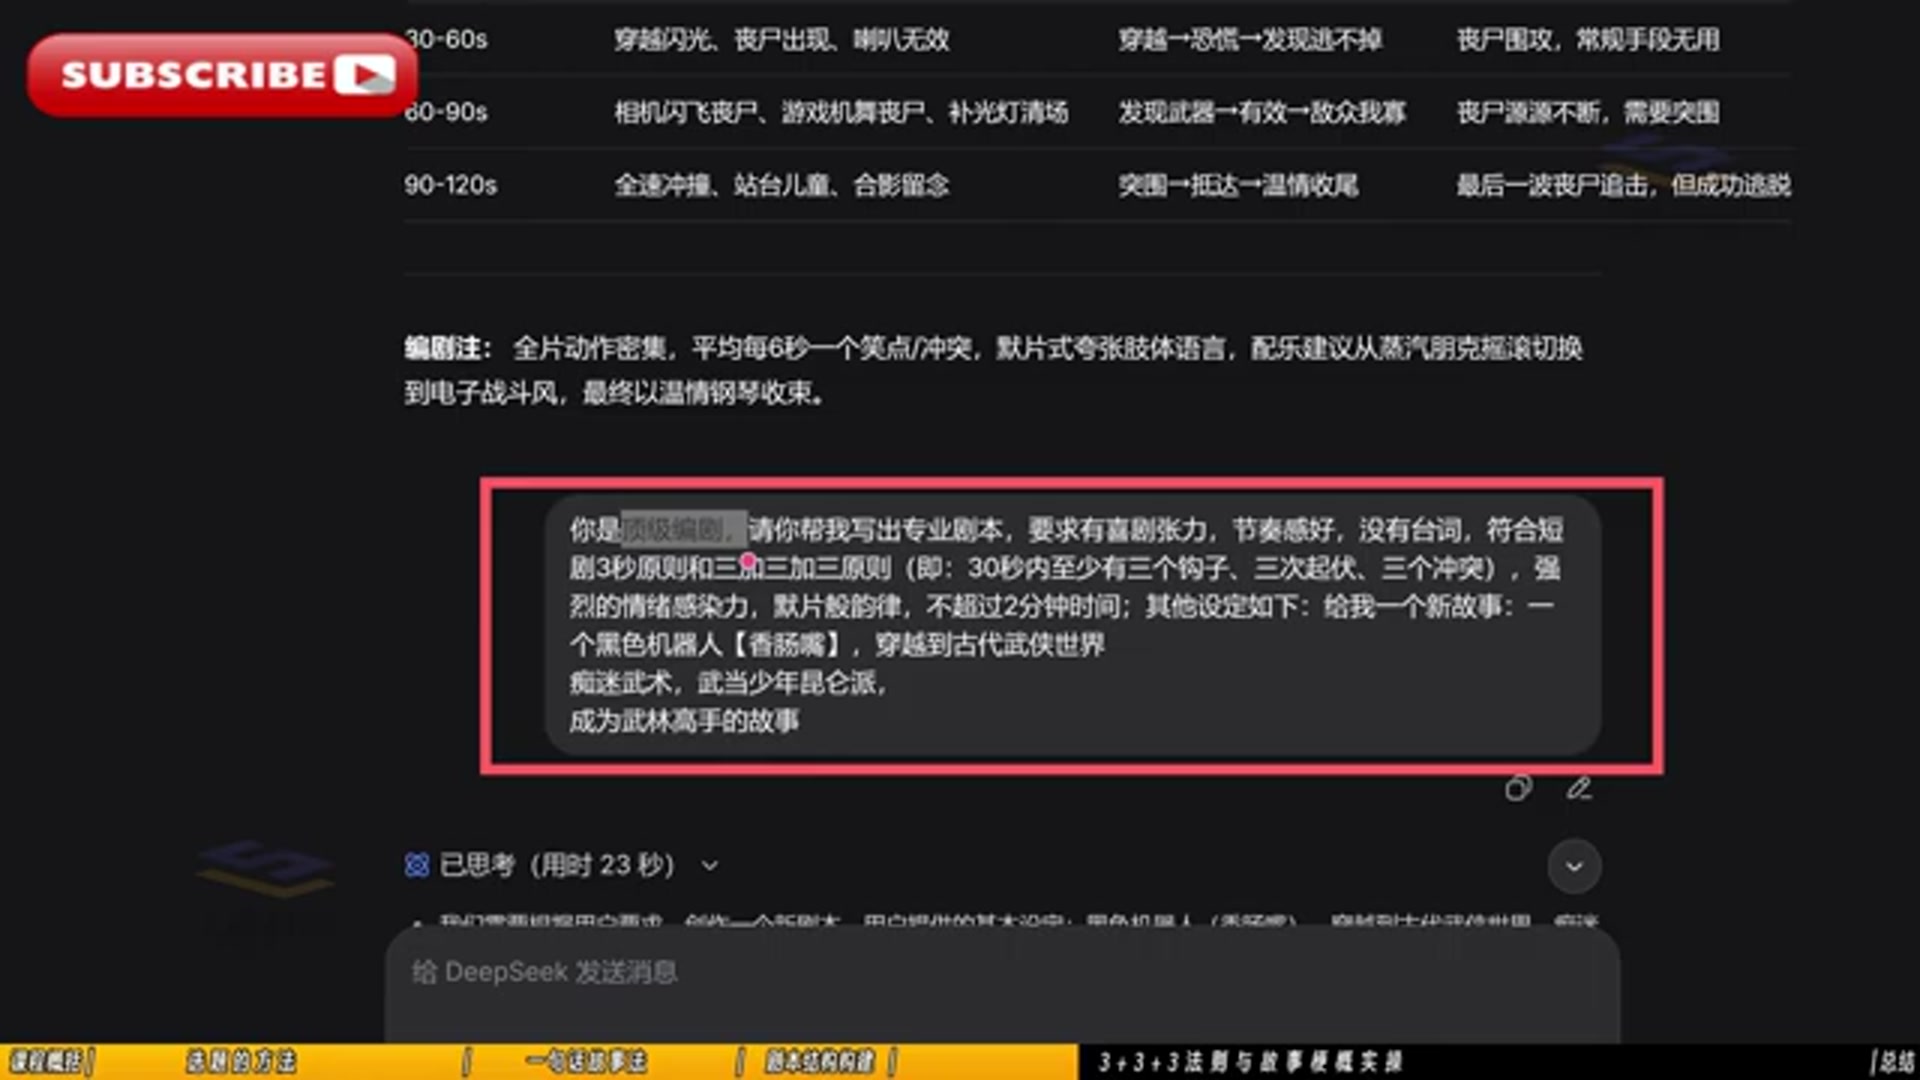
You are a top-tier screenwriter. Please help me write a professional script. Requirements: visual tension, strong rhythm, no dialogue, compliant with the short-drama 3-second principle and the three-act plus-three structure (i.e., at least three hooks, three emotional rises and falls, and three conflicts within 30 seconds), intense emotional impact, cinematic narrative, under 2 minutes total runtime.
The “3+3+3” is the skeleton of short-drama screenwriting: three hooks in 30 seconds to stop the scroll, three rises and falls to drive emotion, and three conflicts to build anticipation. The AI-generated script comes back as a storyboard table:
The four-column structure is ready to copy directly: Timecode / Action / Plot Progression / Conflict Resolution. One row per 30 seconds, with a director’s note on pacing (this example’s note reads “one joke/conflict every 6 seconds on average, with silent-film-style exaggerated physicality”). Notice the “no dialogue” setting — AI short dramas layer in voiceover in post, so the script phase only needs visuals.
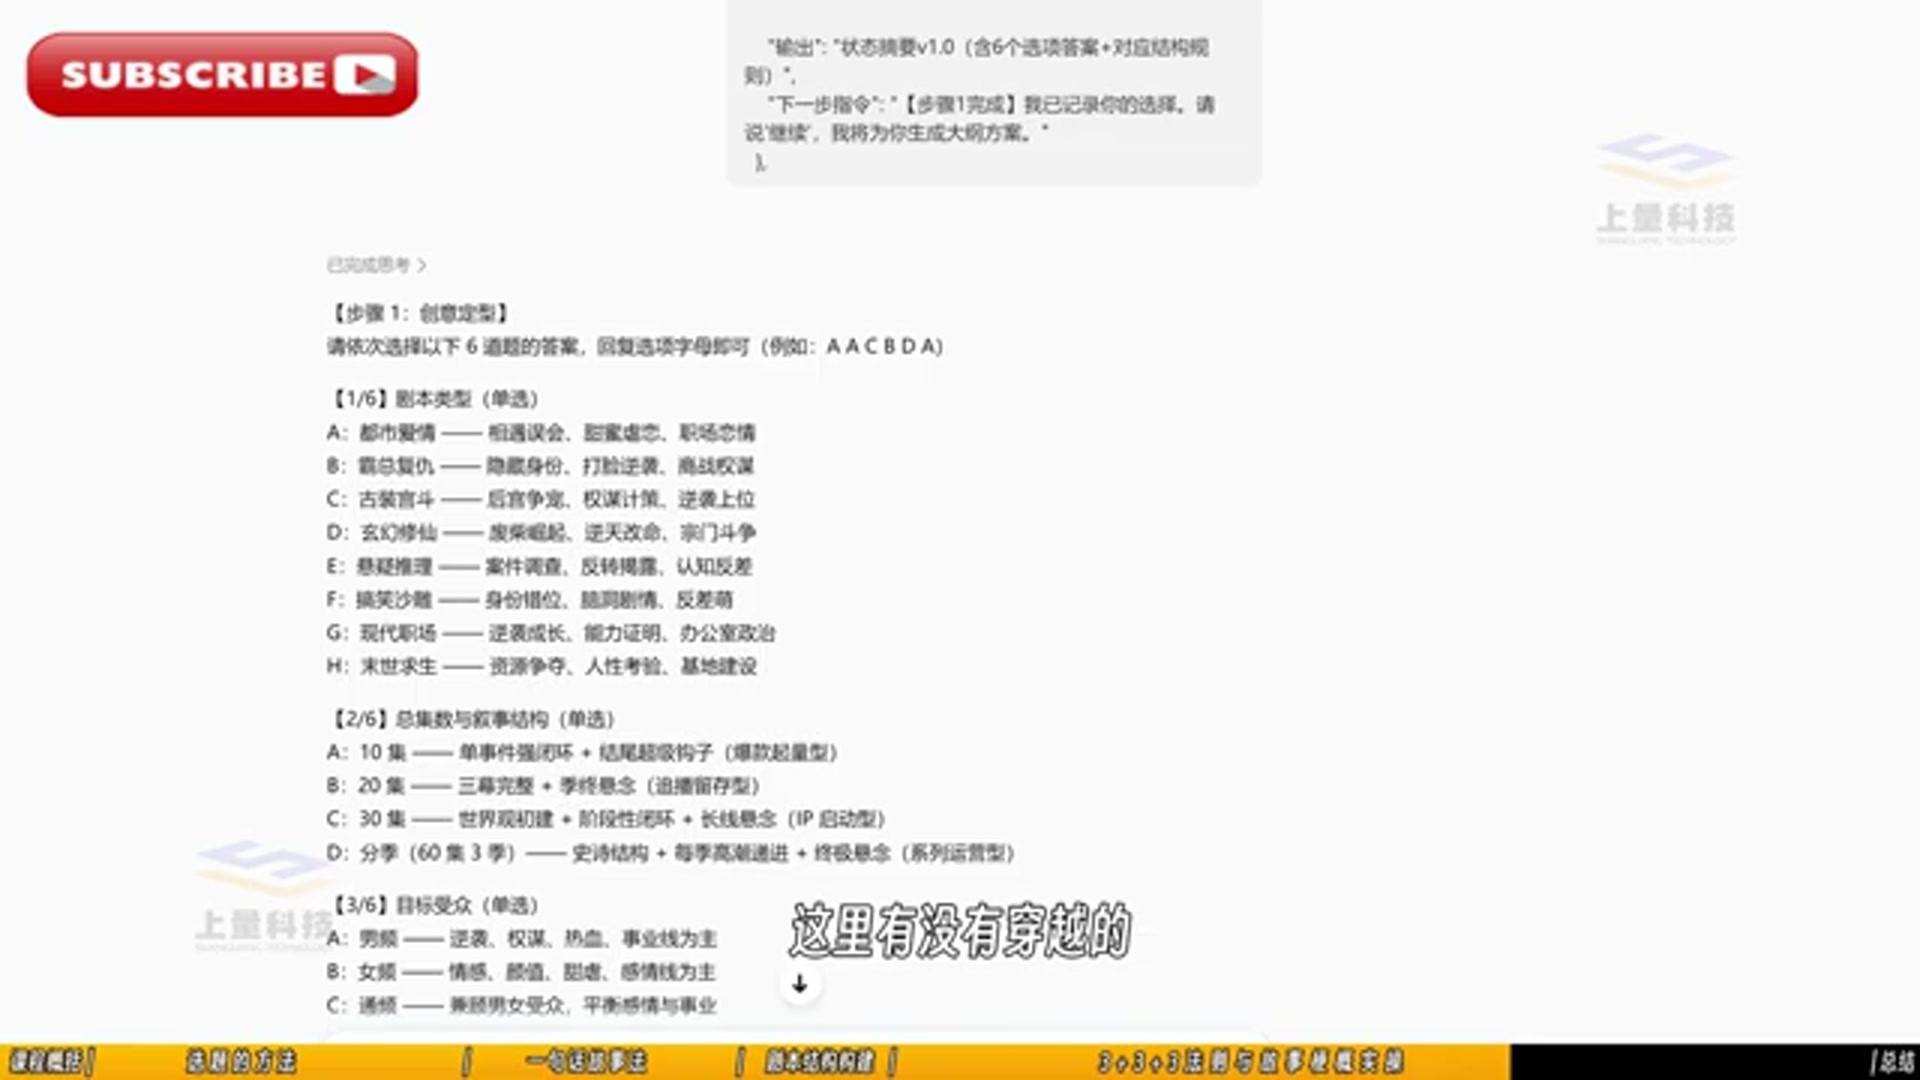
The instructor’s collaboration method with the model is also worth learning: don’t ask for a complete script in one shot. Instead, have the AI present six directional options first, pick one, then say “continue,” converging layer by layer. This is far more reliable than a bare “write me a script.”
Step 3: Break the Script into Four Asset Categories
Many people grab a script and immediately start generating video — the tutorial hits the brakes here: build assets first. Four categories — protagonist assets, supporting/supporting assets, scene assets, and prop assets — each with its own dedicated prompt template.
For props, follow the “product shot” route with this copy-paste template:
Product photography of [item name], [shape description], [material details], pure white background #FFFFFF, even soft frontal lighting with no shadows, UE5 engine photorealistic 3D render, authentic [material] texture, 8K ultra HD
Fill in the tutorial’s example — an ancient bronze key — and you get: round key approximately 20cm in diameter, bronze texture with patina patterns, edge adorned with symbolic decoration marks, ancient and heavy feel. Paste the second half verbatim and you have a qualified product-shot prompt.
Scenes follow the “empty shot” route with an equally fixed template: unoccupied scene + environment description + UE5 photorealistic 3D render + 8K.
There’s also a methodology for designing characters before you even open the tool:
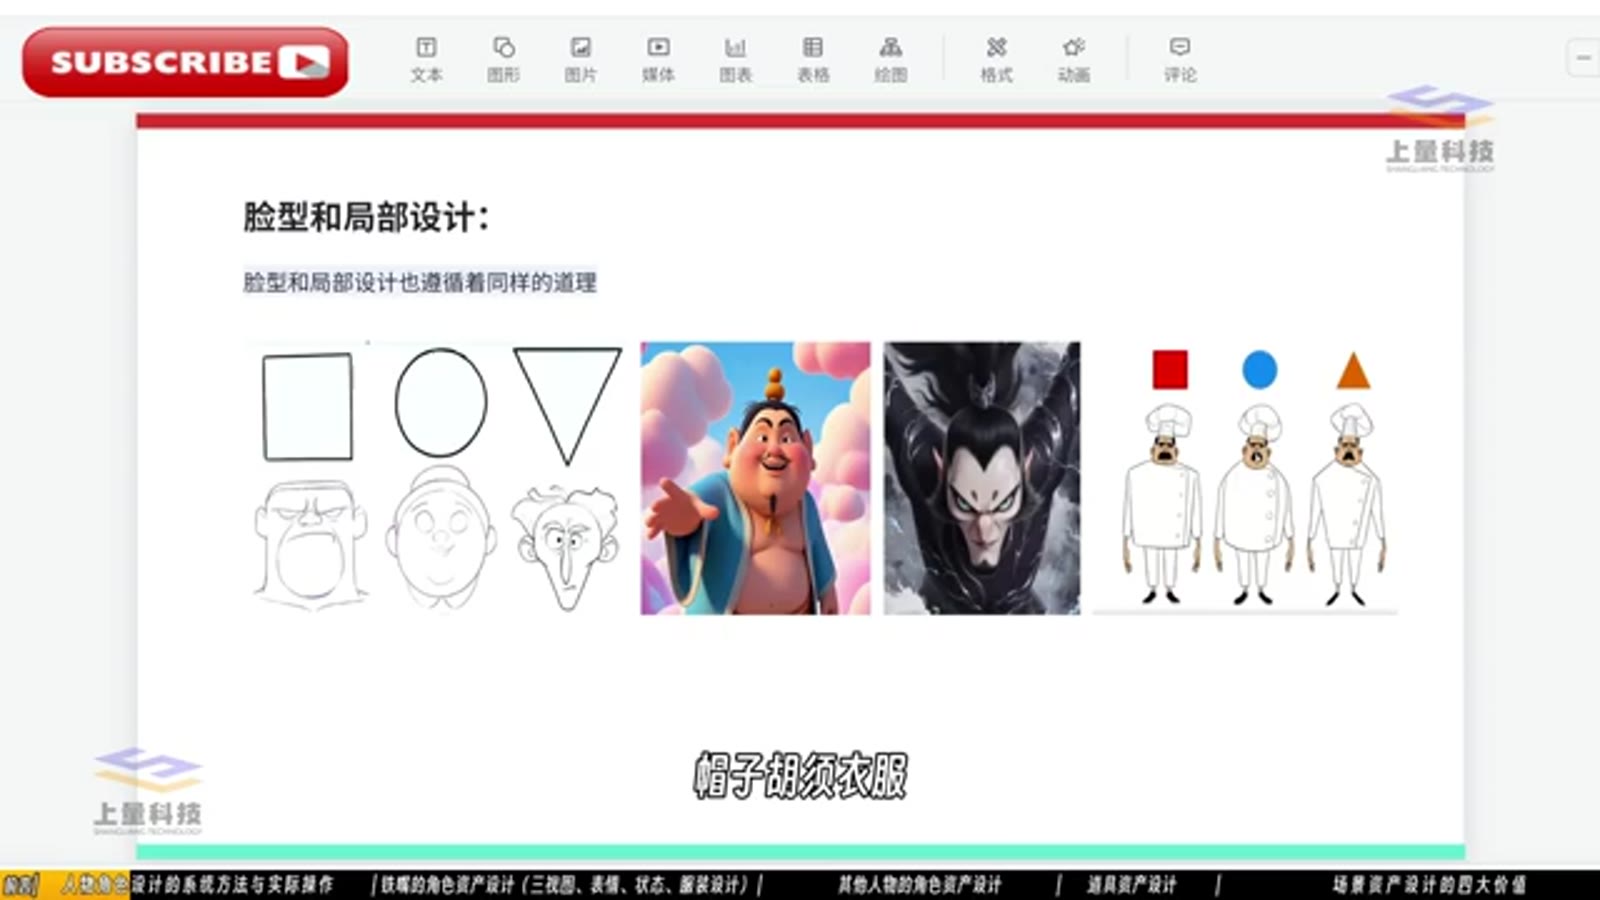
Use the three basic geometric shapes — circle, square, triangle — to unify control over a character’s face shape, body type, and local features. The hat’s silhouette, the direction of the beard, the contour of the clothing all follow the protagonist’s geometric identity. Sharp triangles for the villain, soft circles for the comic relief. The audience “reads” the character before they even see the face.
Step 4: LibTV’s Killer Feature — Character Turnarounds
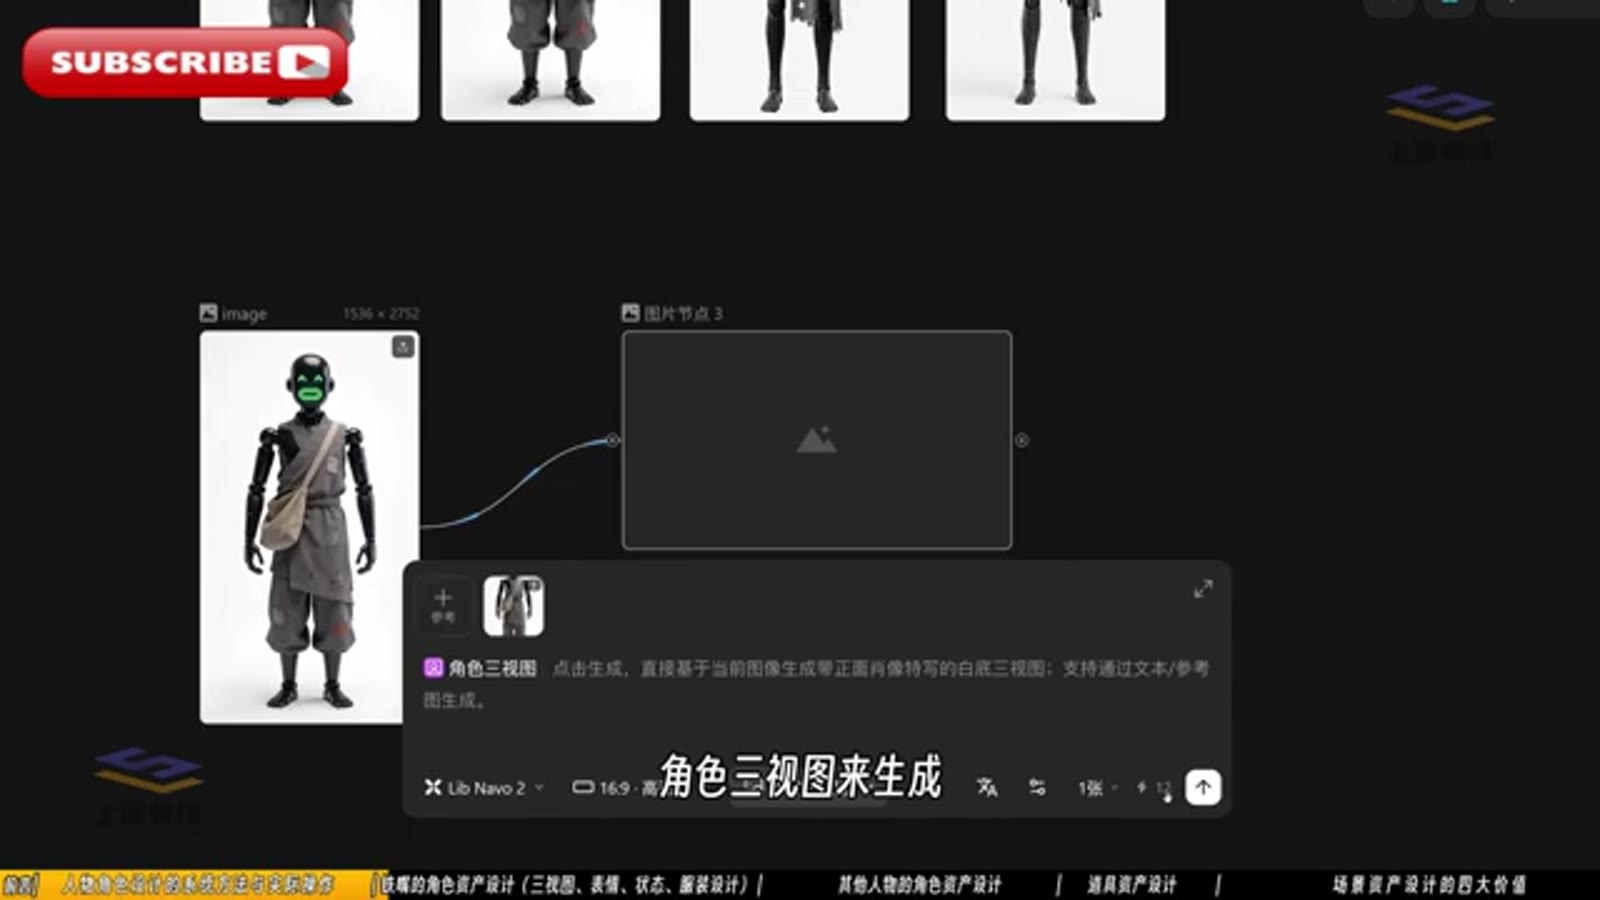
Place an image node in the LibTV canvas to hold the character reference, connect it to the generation node, and select the “character turnaround” template. The feature description reads:
Click generate to directly produce front/back/45°仰view turnaround sheets on a white background based on the current image; supports generation via text or reference images.
Parameters: Lib Nawo 2 model, 16:9 aspect ratio. This step is the foundation of character consistency — once the turnarounds are generated, hang them as reference images for every subsequent shot, and the character’s appearance stays locked in.
The chapter further breaks character assets into three routes: low-cost characters (turnarounds/expressions/states/outfits), anthropomorphic characters, and crowd/group figures — plus props and scenes — completing the “four asset pillars.”
Step 5: Understand Story Structure Before Storyboarding
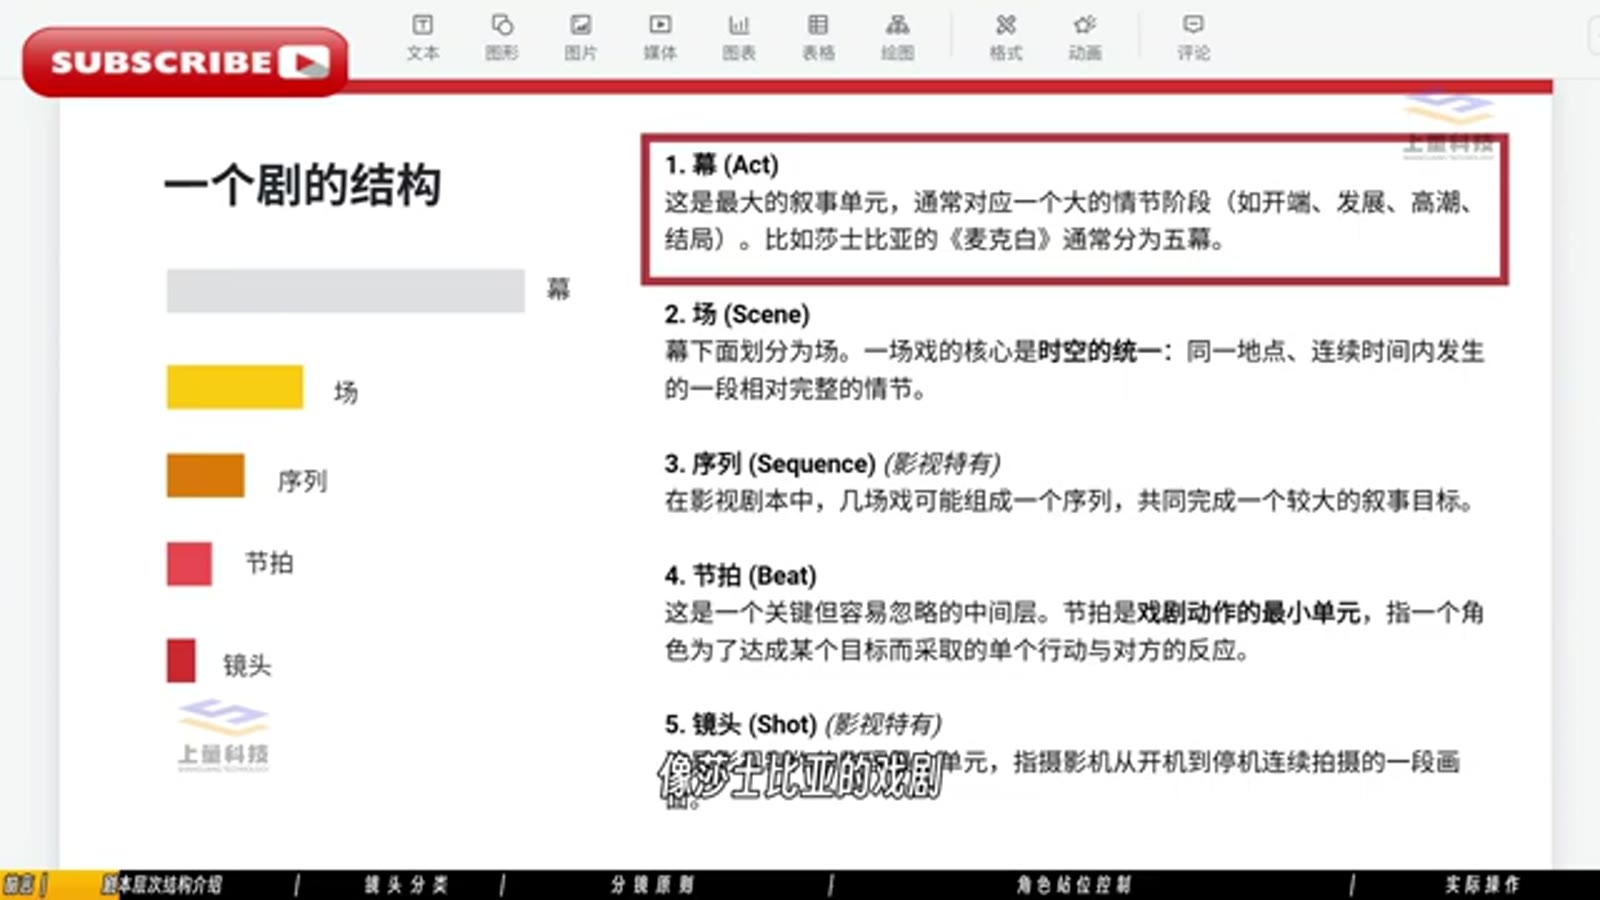
The five layers from the slides: Act → Scene → Sequence → Beat → Shot. The most容易被 overlooked is the beat — “a single action taken by a character to achieve a goal, and the reaction it provokes.” Every row in your storyboard is, at its core, a beat.
Translated to practice, this means organizing storyboard prompts onto the canvas:
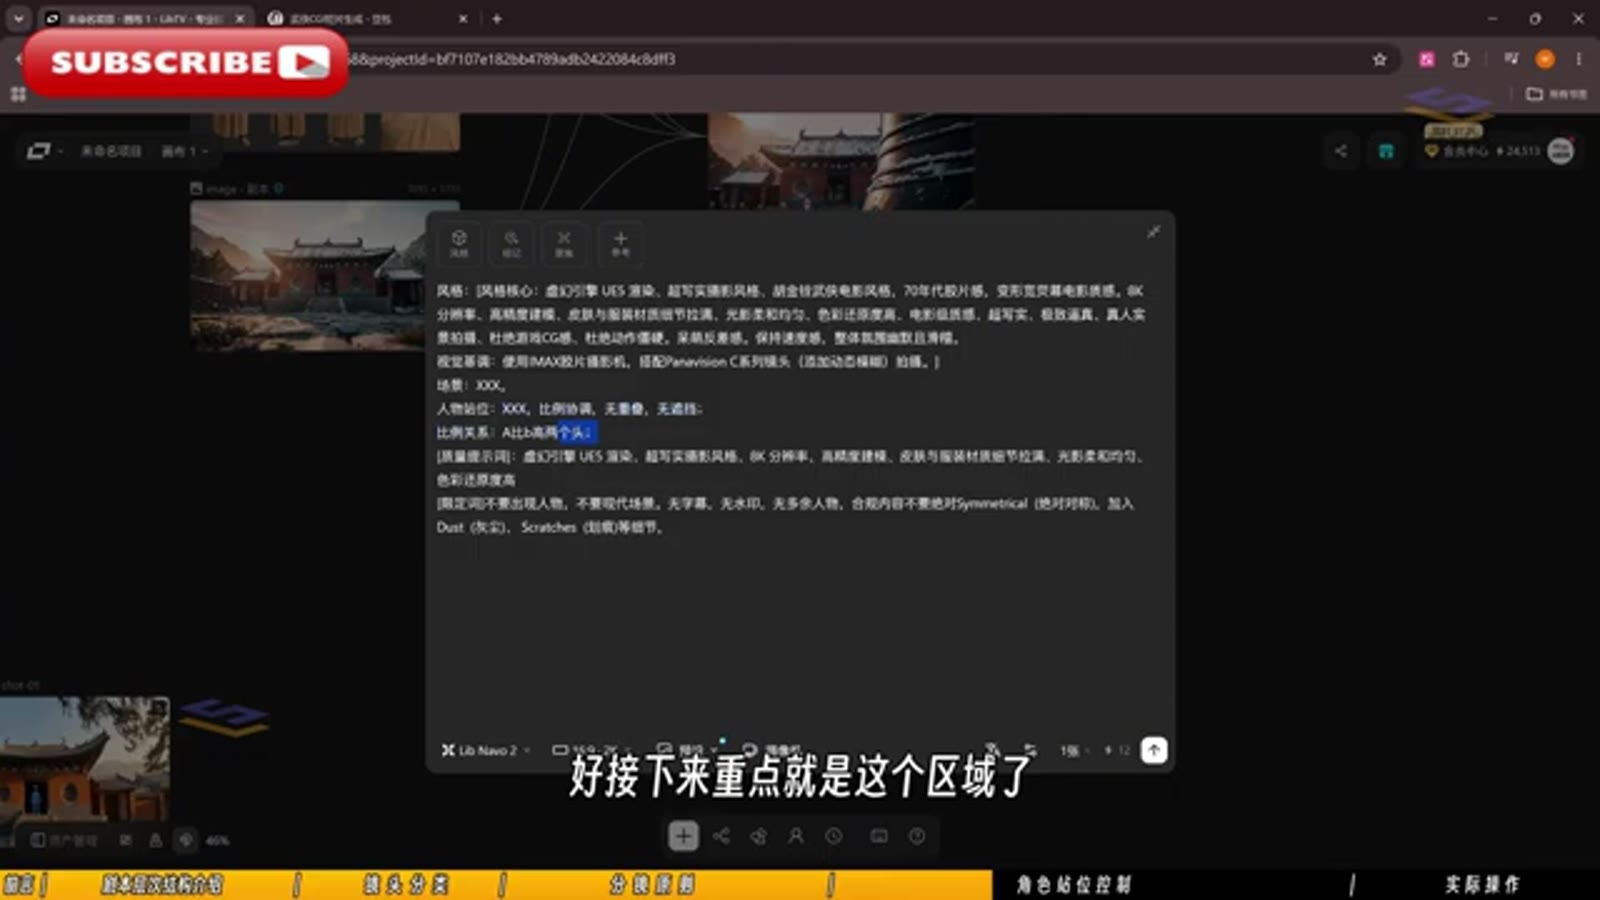
Scene reference images on the left column, generation results on the right, nodes connected with lines, scroll-wheel zoom and pan. The output of the storyboard phase is a row of “established nodes,” each tagged with its resolution (1280×720 = 720p target).
Step 6: The RTCF Prompt Framework and Camera Language
The four RTCF elements are laid out in full at the bottom of the slide: image aesthetics (style, composition, shot distance, angle, framing, lighting, color grading). The tutorial breaks this list into six “angle” cards demonstrated one by one:
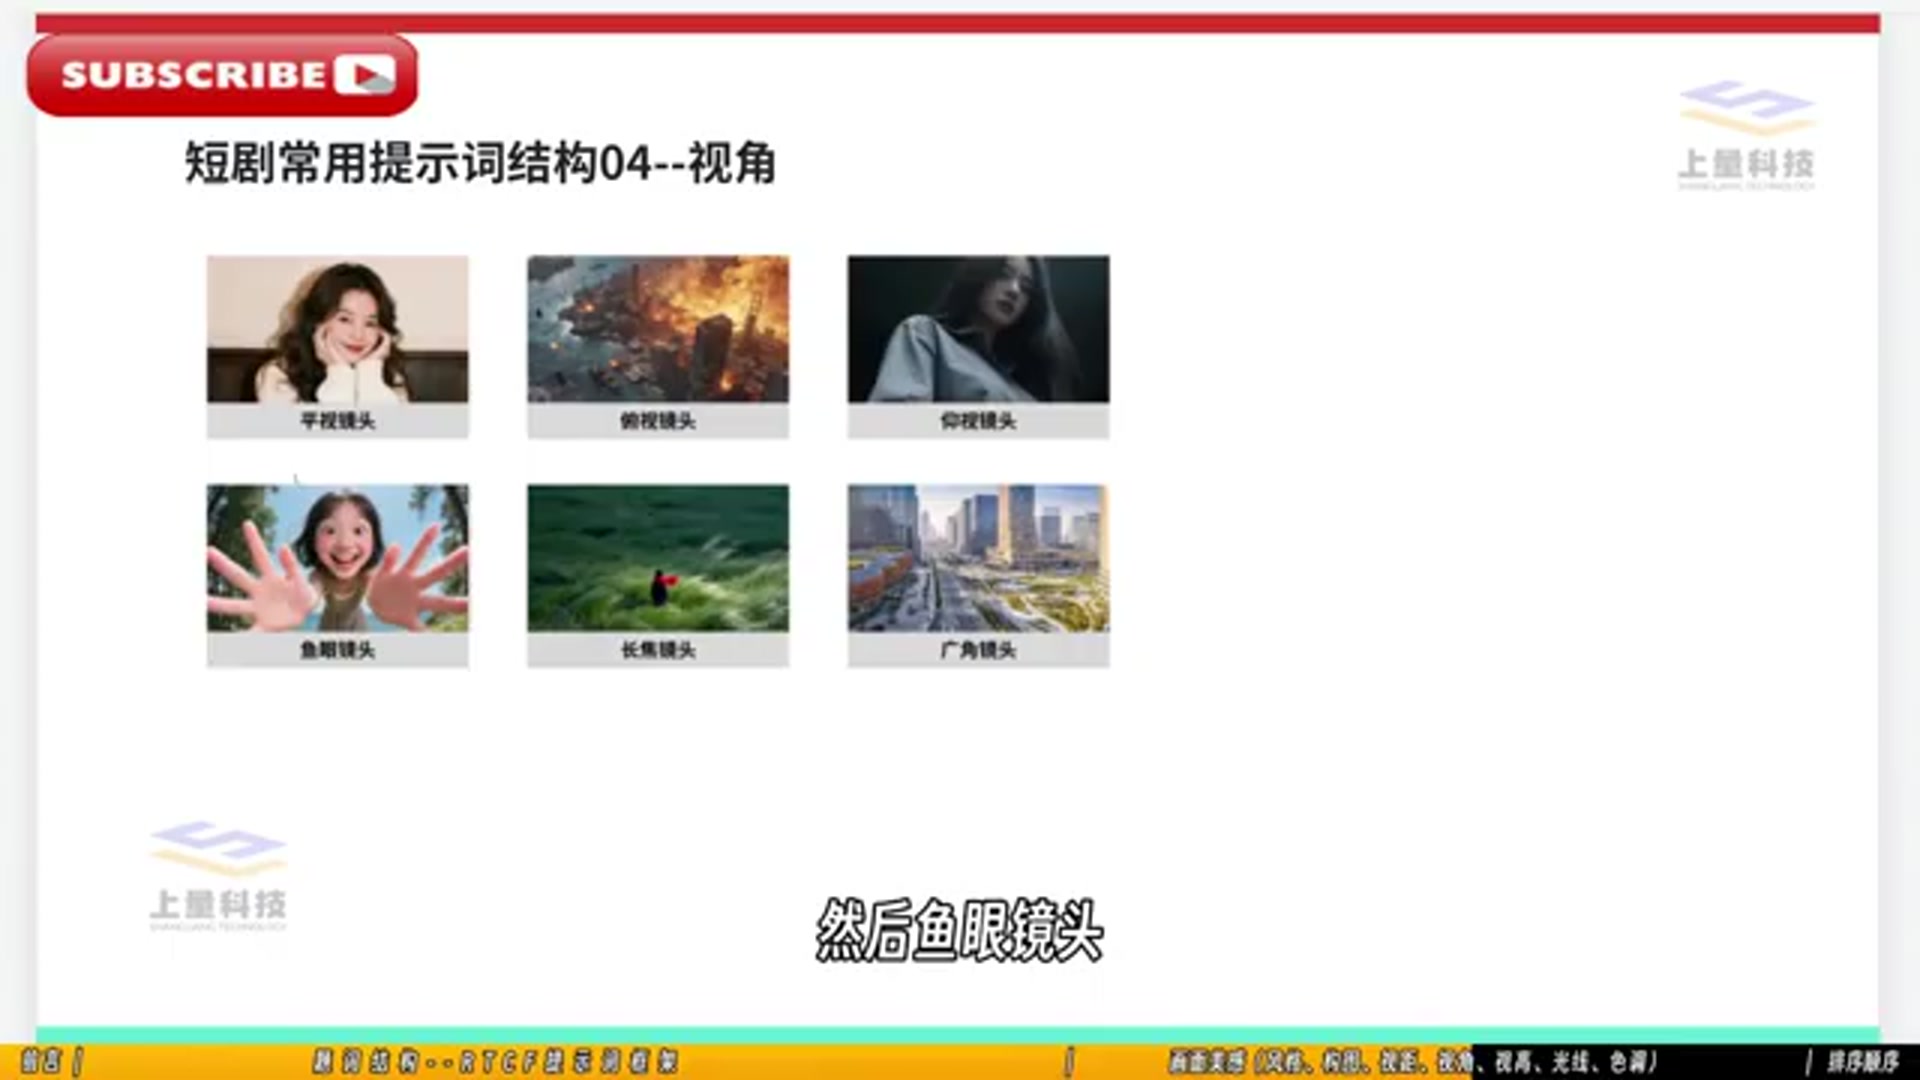
Eye level, high angle, low angle, fisheye, telephoto, wide-angle — each with an example frame. When writing prompts, the angle descriptor must appear explicitly. The words “fisheye lens” are far more effective than “exaggerated distortion.”
Here’s a full example from a live generation frame to feel the density:
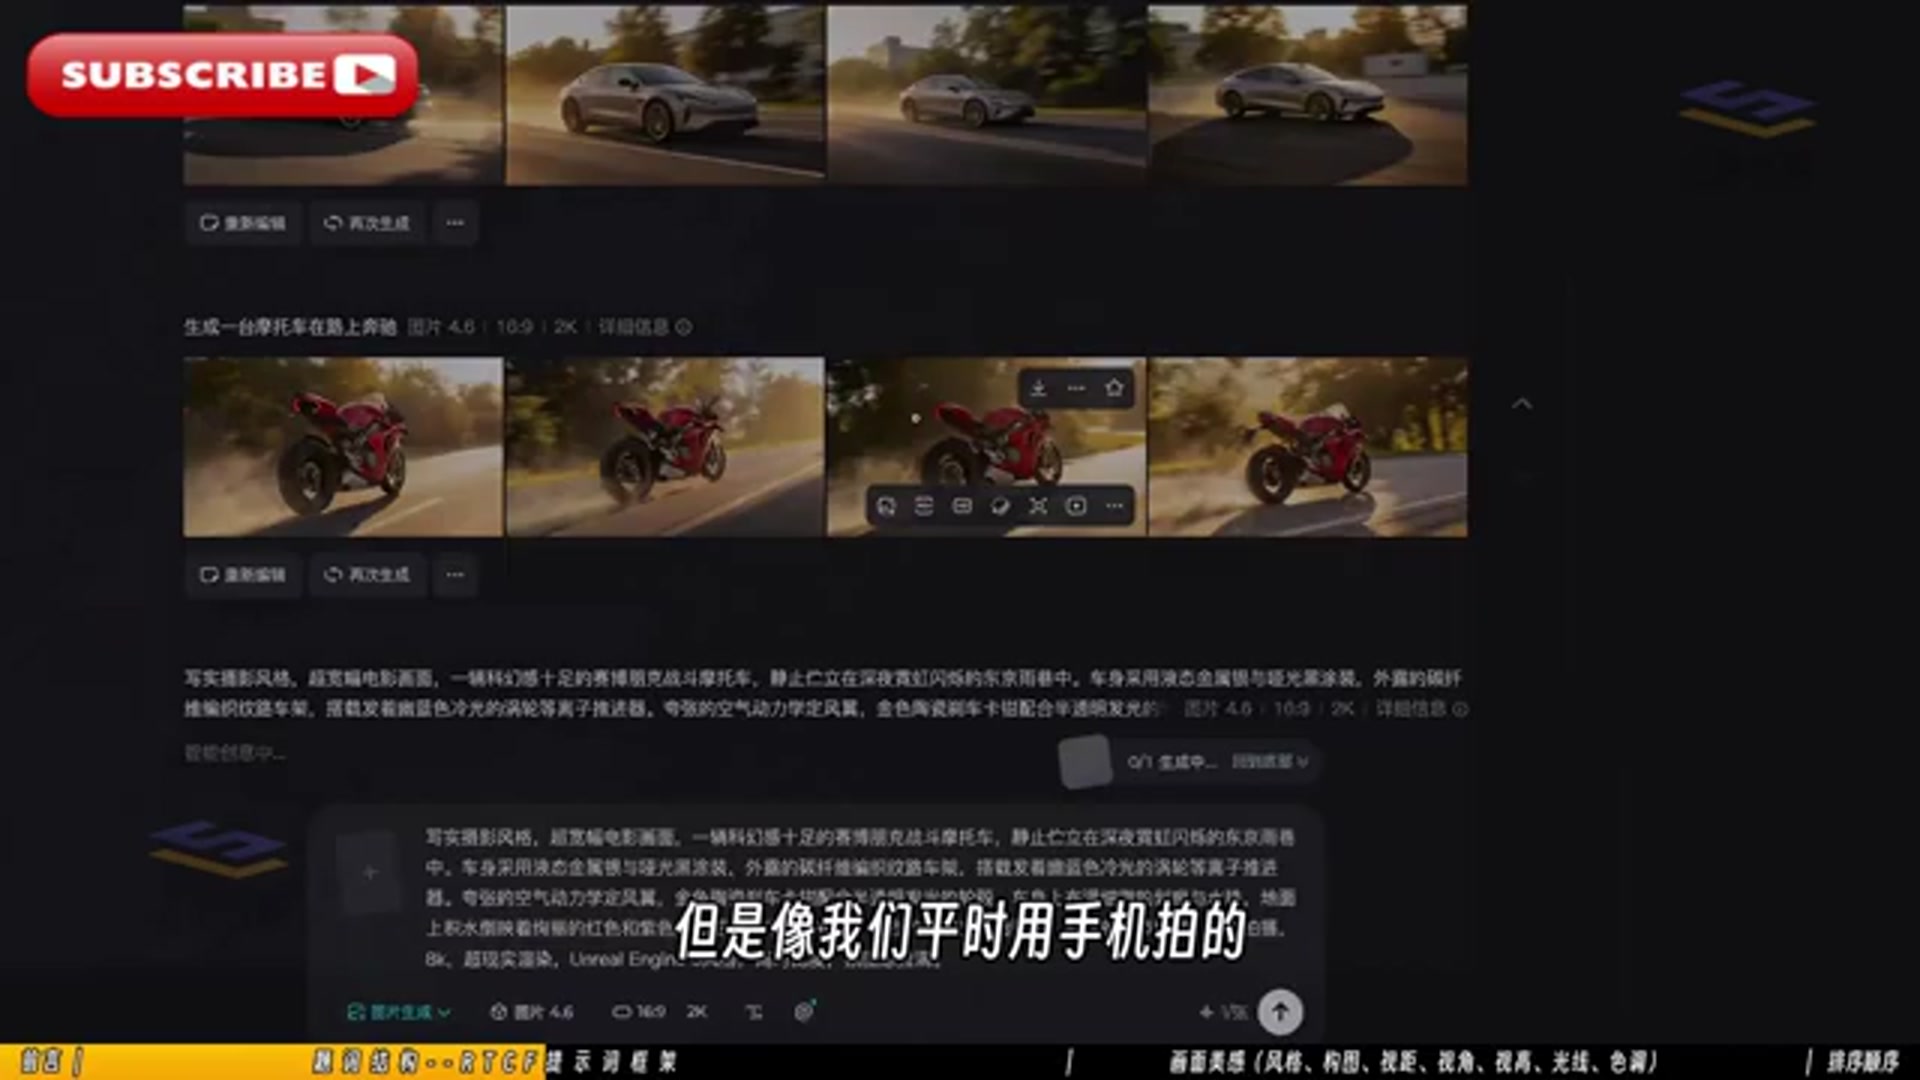
Photorealistic style, ultra HD cinematic frame, [subject], [environment], 8K, hyper-realistic render, Unreal Engine — style tags, quality tags, engine tags, all accounted for. The AI doesn’t guess; it needs to be fed everything.
Step 7: Multi-Image Referencing in Video Generation
At the video generation node, all the assets built earlier converge:
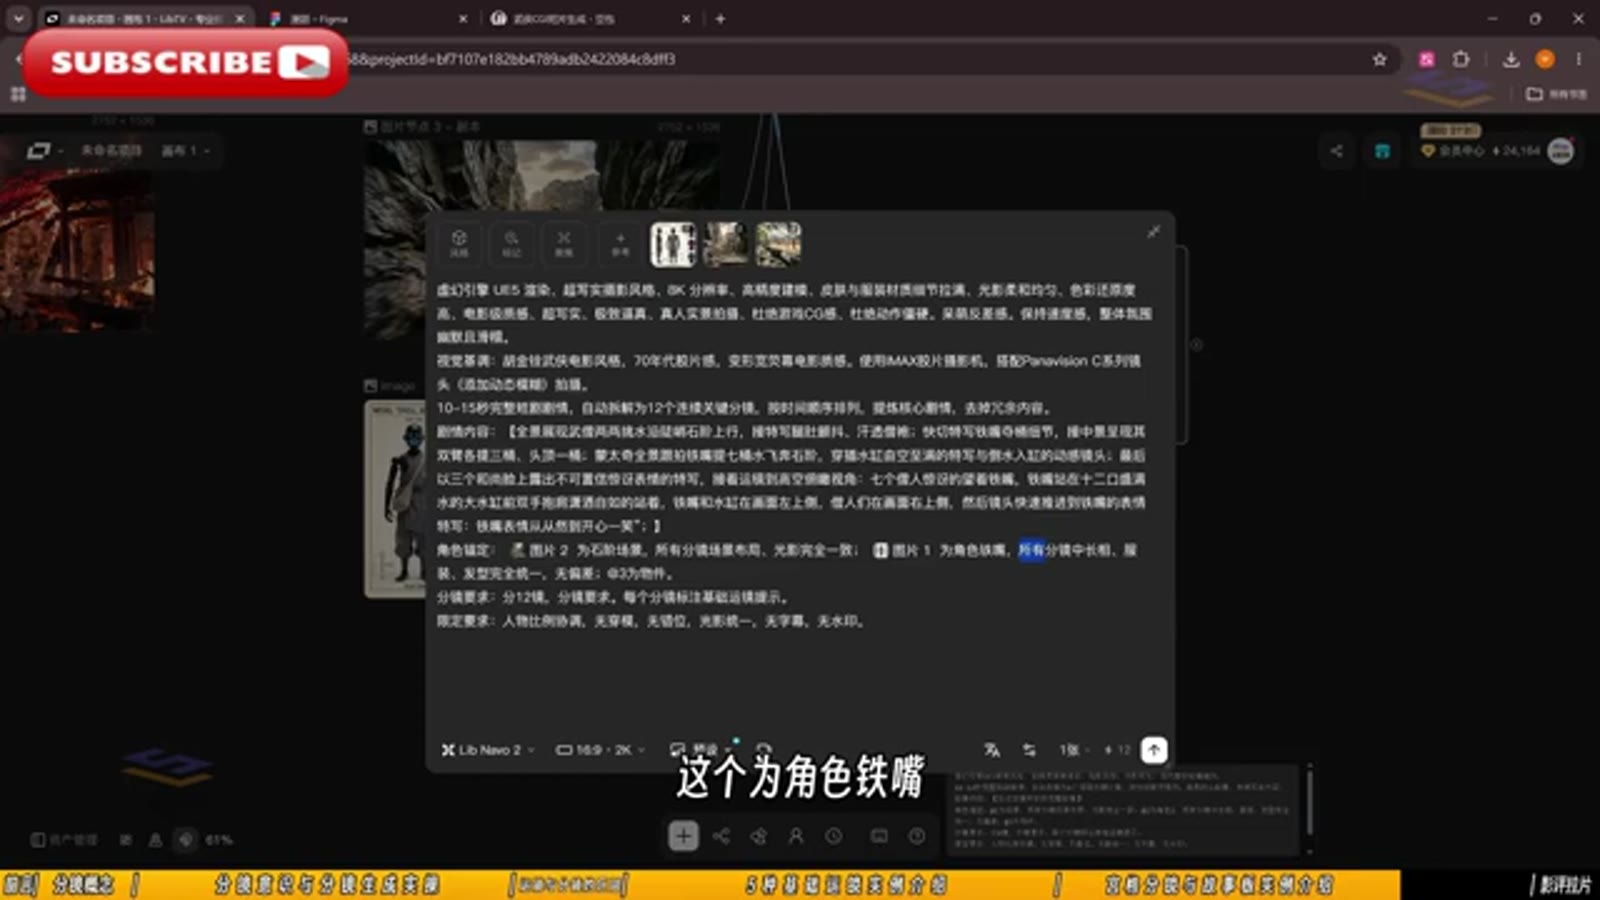
The prompt references images by number: [Image 1] is the character Iron Mouth (appearance/expression/demeanor/costume follows the reference), [Image 2] is the scene — the model recognizes images, not words, and number-binding is the core usage pattern of LibTV’s multi-image reference. The prompt structure follows this template verbatim: storyboard overview (Shot N, exterior/interior) → visual content → character setup (with image number references) → constraints (consistent character proportions, matching hair and costume).
The generation parameter panel:
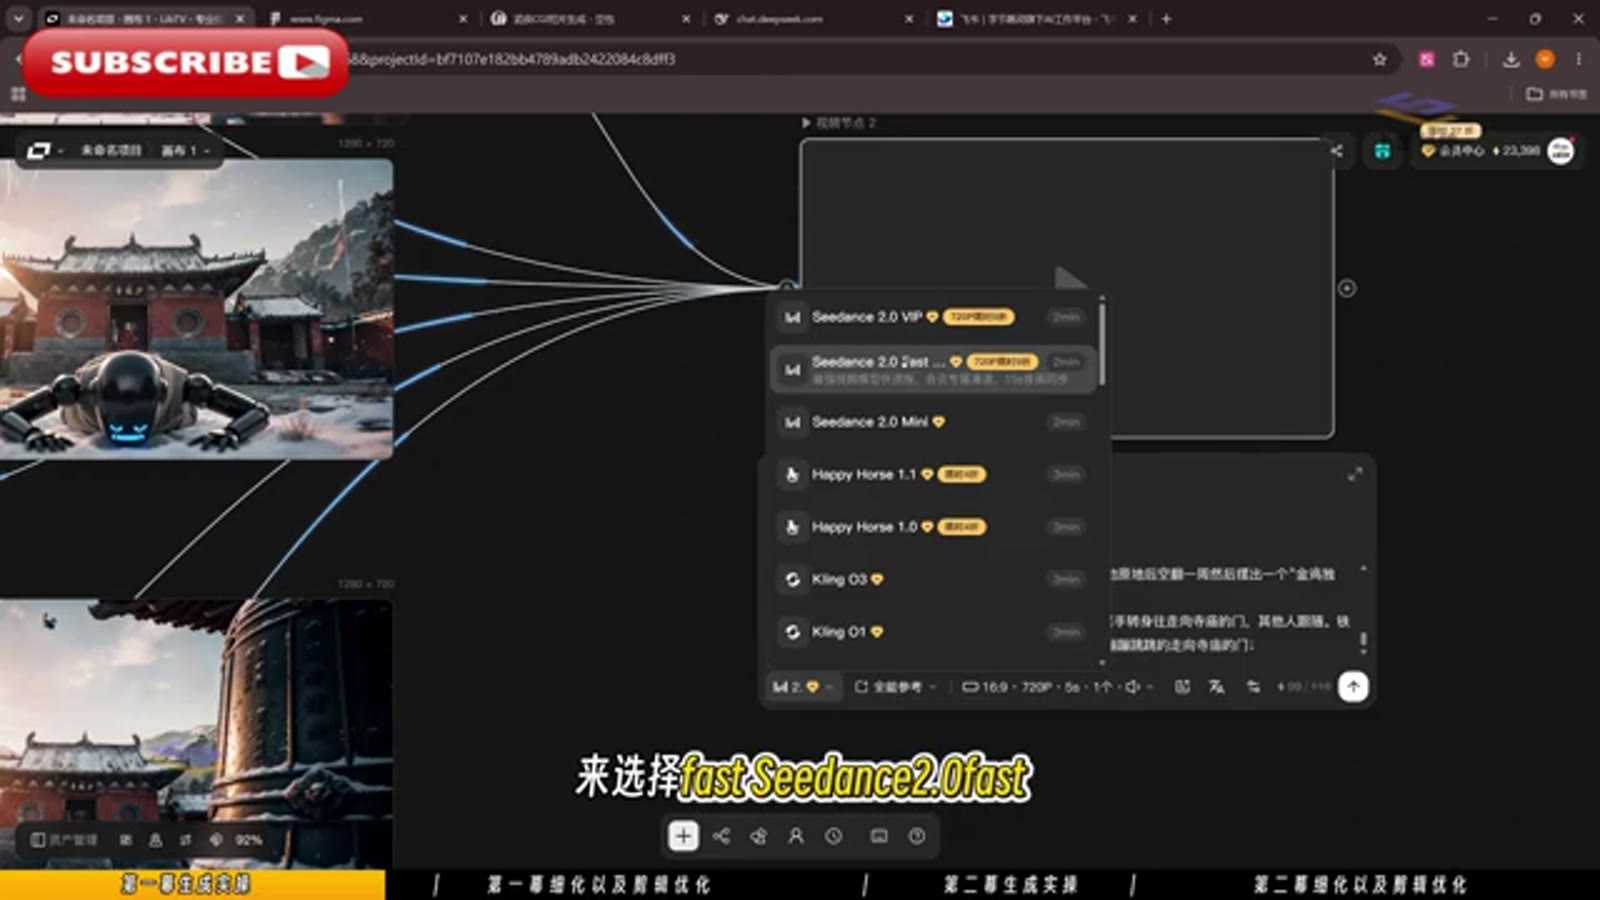
Model dropdown options include Seedance 2.0 VP / Fast / Mini, Happy Horse 1.1 / 1.0, Kling 03 / 01. The tutorial’s default selection: Seedance 2.0 Fast + Full-Image Reference Mode + 16:9 + 720p + 6 seconds + 1 clip. Full-Image Reference means all hung reference images collectively constrain the output — this is the toggle for multi-subject consistency.
Step 8: CapCut Wrap-Up
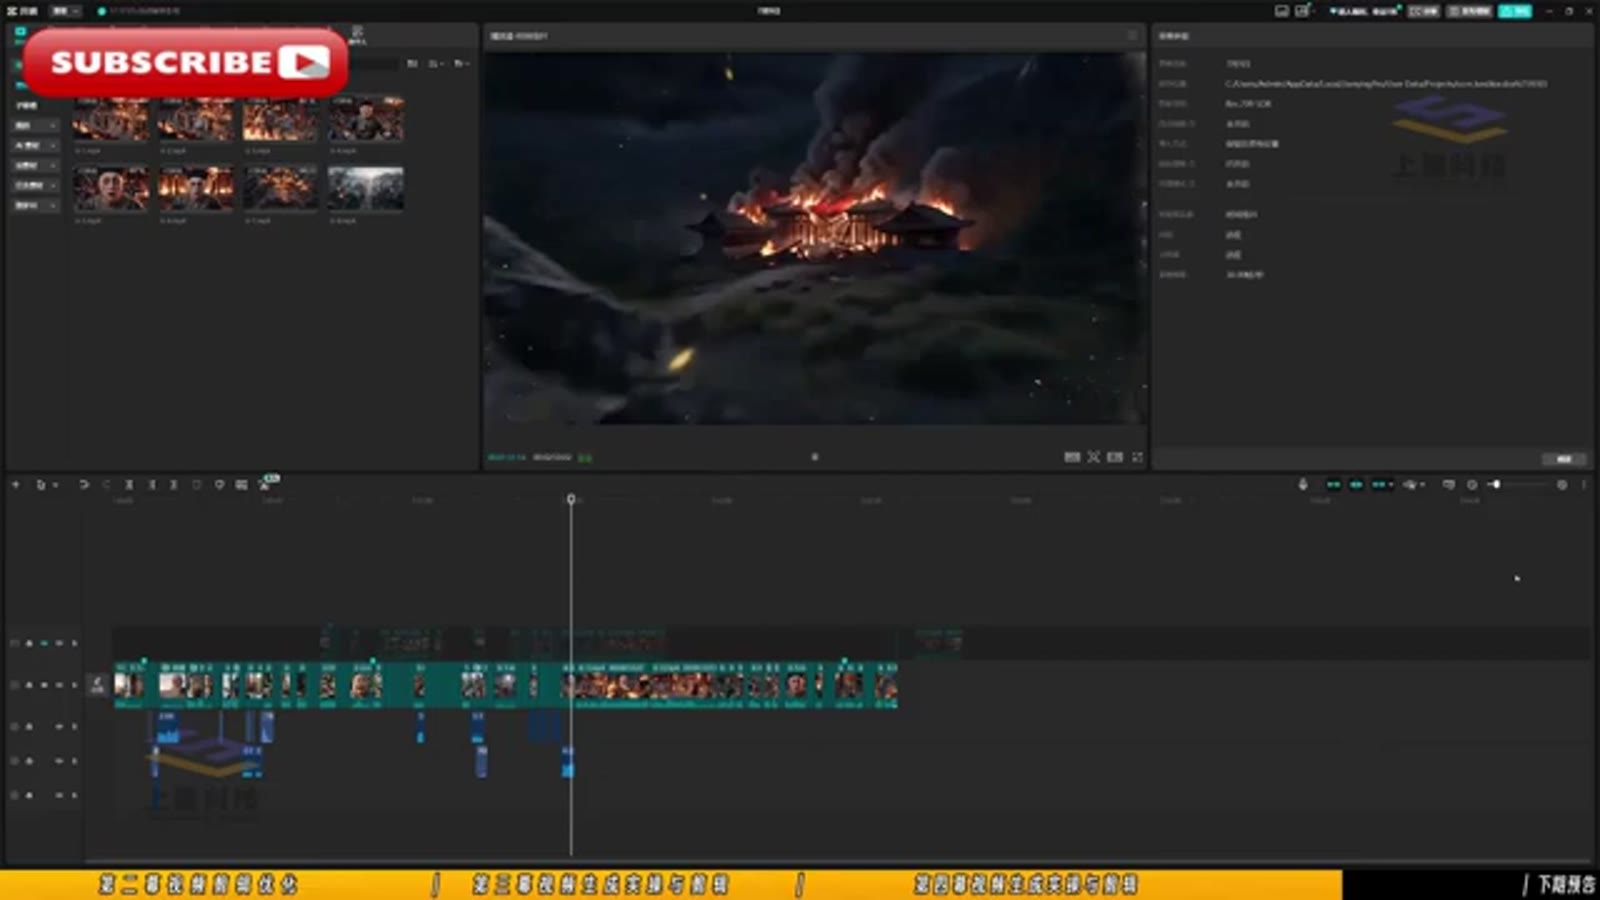
Lay the clips onto the timeline in storyboard order, with a 0.5-second black screen at the very beginning — that’s how you get the breathing-room opening gesture that defines short-drama pacing.
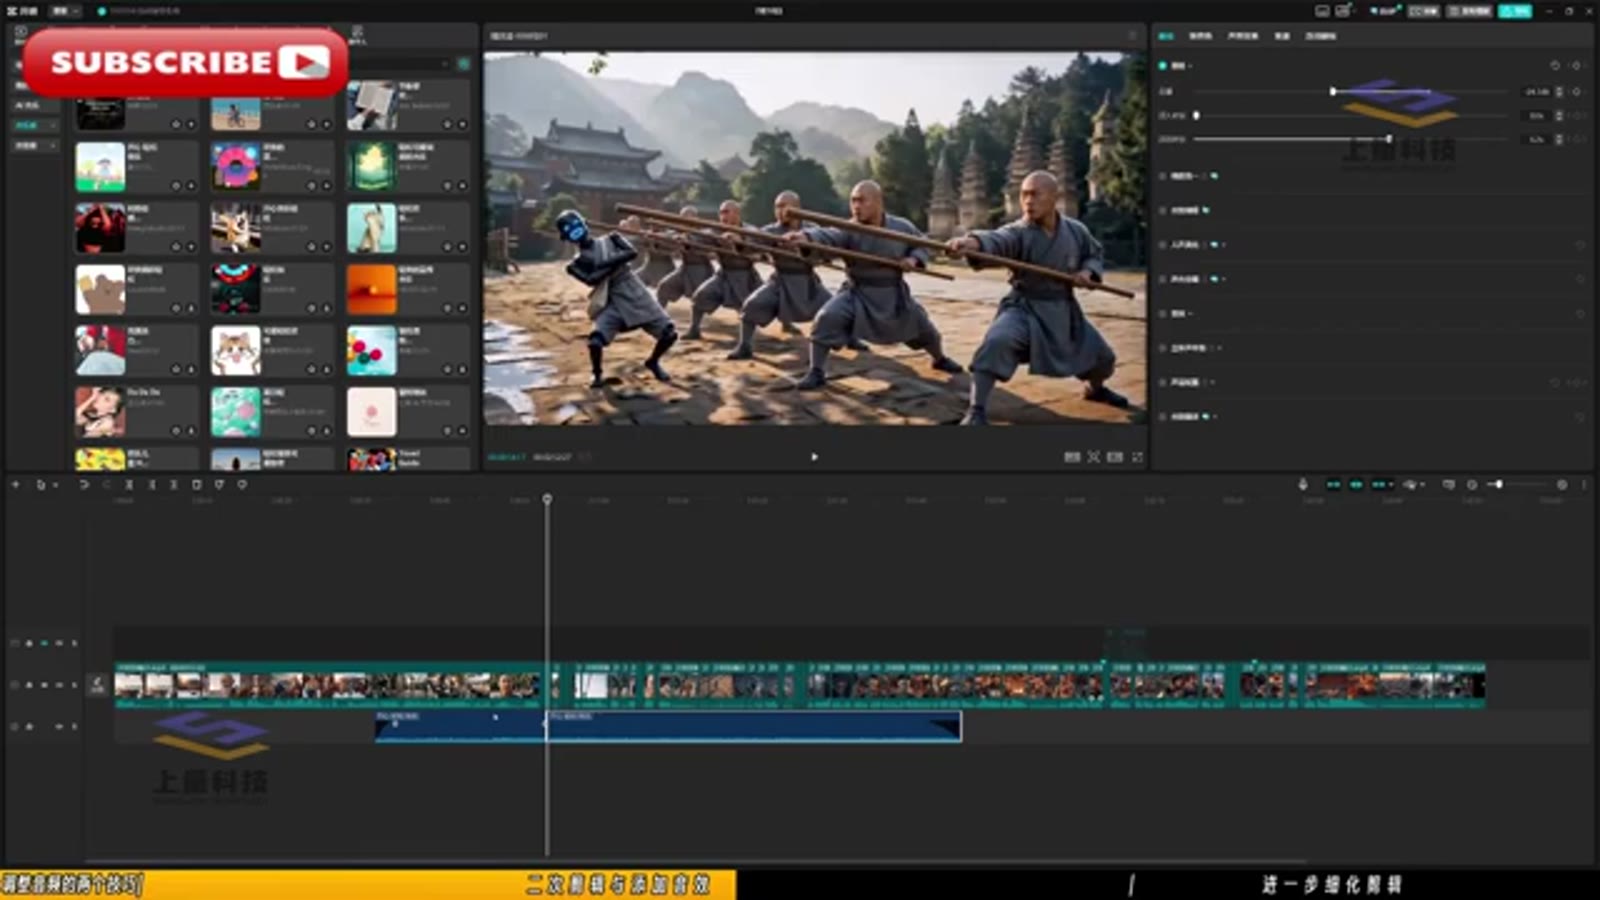
The final three moves: pull from the SFX library for “all sounds except dialogue” (ambience, Foley), select atmospheric BGM from the music library and extend the track, then set volume and fades. For subtitles, use CapCut’s AI speech recognition to auto-generate, then manually correct errors. The instructor’s director notes already specified the musical direction: “steampunk dance track cutting into electronic battle style, closing on a tender piano motif.”
14-Step Quick Reference
| Step | Action | Key Parameters / Templates |
|---|---|---|
| 1 | Familiarize with JIMENG + LibTV | Search reference videos in asset library |
| 2 | AI scriptwriting | 3+3+3 rule prompt, act-by-act convergence |
| 3 | Break script into storyboard table | Timecode / Action / Progression / Conflict — four columns |
| 4 | Prop + scene assets | Product-shot / empty-shot templates + UE5 + 8K |
| 5 | Character geometric design | Circle-square-triangle shape language |
| 6 | Character turnarounds | Lib Nawo 2, white-background three-view |
| 7 | Storyboard canvas | Established nodes + beat breakdown |
| 8 | RTCF prompts | All seven aesthetics elements written explicitly |
| 9 | Camera language | Six angle descriptors in prompts |
| 10 | Video prompts | Image number binding for characters |
| 11 | Generation parameters | Seedance 2.0 Fast + Full-Image Reference |
| 12 | Aspect ratio settings | 16:9 / 720p / 6s |
| 13 | Editing | 0.5s black-screen opener + storyboard ordering |
| 14 | Sound design | SFX + BGM + fades |
The most counterintuitive thing about this pipeline: video generation is step 11, not step 1. The first ten steps are all about building constraints — the script constrains the narrative, assets constrain appearance, storyboards constrain composition, prompts constrain the frame. Seedance’s “acting” only delivers once every constraint is in place.
Tutorial source and cost breakdown are in the previous post: Why Seoul Is a Bit Rough Today Doesn’t Look Fake.